Slicer Settings Explained: A Beginner's Guide for PrusaSlicer & Bambu Studio
I. Introduction: What is a Slicer, Really? Before your 3D printer can start printing, it needs instructions—a G-code file. That's where slicers come in. A slicer takes your 3D model (usually an .STL or .3MF file), slices it into horizontal layers, and creates a set of commands that tells your printer exactly what to do.
In this tutorial, we'll demystify the essential slicer settings that impact your print quality. We'll focus on two of the most widely used slicers in 2025:
PrusaSlicer (for Prusa and many open printers) Bambu Studio (for Bambu Lab printers)
Whether you're printing miniatures, cosplay armor, or functional parts, understanding these core settings will help you get better results with less guesswork.
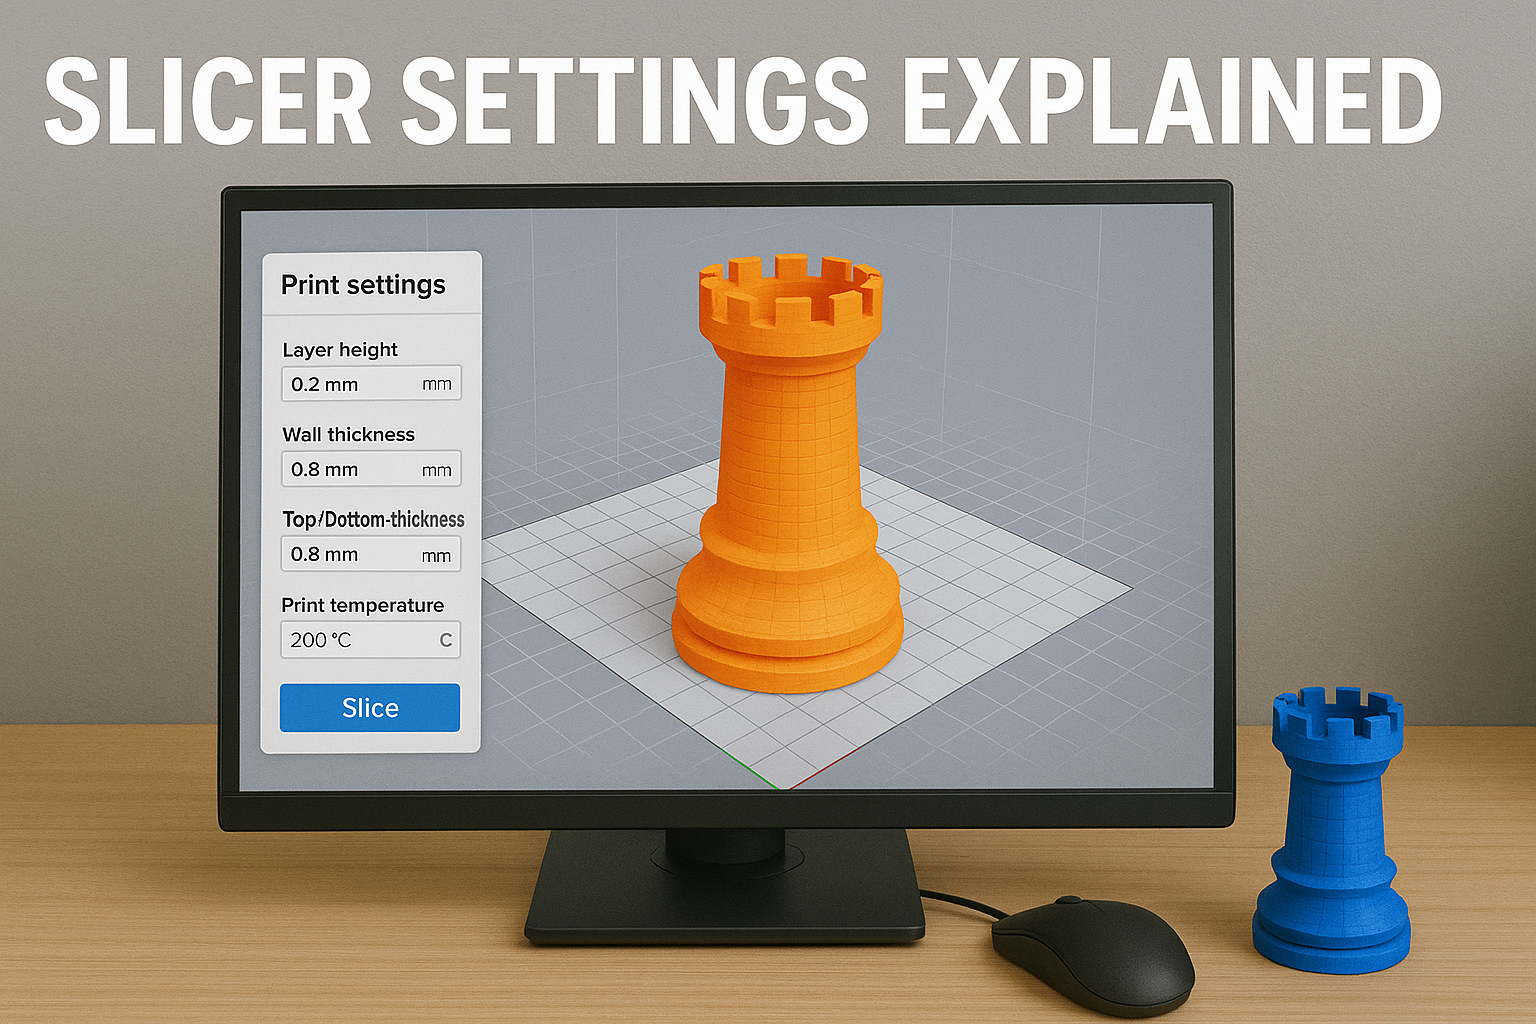
II. Layer Height: Detail vs. Speed What it is: The thickness of each printed layer, usually measured in millimeters (e.g., 0.2mm).
Lower = More Detail - 0.1mm → smoother surfaces, great for miniatures - Slower print times
Higher = Faster Prints - 0.3mm → rougher surface, great for large or functional parts - Quicker prints
In PrusaSlicer: Look under Print Settings > Layer Height. Use "Adaptive Layers" if you want detail only where it matters.
In Bambu Studio: Under Quality > Layer Height. The "Standard" preset uses 0.2mm, but you can tweak from there.
III. Infill Density & Pattern: Strength vs. Speed What it is: The internal structure of your part.
Density (%): How solid your print is. 15-20% is typical. Patterns: Gyroid, grid, cubic, etc.
Quick Tips: - 10–20% is great for decorative or light-use parts - 50–100% for strong, functional prints - Gyroid is strong and fast to print
In PrusaSlicer: Infill > Fill Density + Pattern. You can even mix infill types in advanced mode.
In Bambu Studio: Infill > Density + Pattern. Defaults are well-optimized, but easy to change.
IV. Print Speed: Fast vs. Reliable What it is: How fast the printer head moves. Bambu Lab machines go fast by default, but speed isn't always your friend.
Slower = better quality (40–60mm/s) Faster = more visible artifacts (but fine for draft-quality or big parts)
PrusaSlicer: Set in Speed > Default Print Speed. Customize speeds for perimeters, infill, supports, etc.
Bambu Studio: Set in Speed > Presets (Standard, Sport, Ludicrous). You can fine-tune these if needed.
V. Perimeters, Shells & Walls: Outer Strength What it is: How many outlines (or "walls") your printer creates around each layer.
- 2 perimeters: Good for basic models - 3+ perimeters: Better strength and surface finish - Top/Bottom layers: Controls how solid the top and bottom are
In PrusaSlicer: Layers and Perimeters > Perimeters + Solid Layers
In Bambu Studio: Wall Loop Count under Shell. "3 walls" is a strong, safe default.
VI. Supports: Helping Overhangs What it is: Temporary structures to hold up overhangs or bridges.
Types: - Automatic vs. Manual: Auto is fine for beginners - Everywhere vs. Touching Build Plate: Choose based on how complex the model is
PrusaSlicer: Supports > Enable + Options. Use Paint-On Supports for control.
Bambu Studio: Supports > Support Style + Placement. Preview mode shows what's being generated.
Tips: - Use a brim or raft with supports for better adhesion - Test settings on small prints first
VII. Adhesion: Keep It on the Bed - Brim: Adds rings around the base—good for narrow models - Raft: Lifts the whole model off the bed—useful for warped materials - Skirt: Doesn't touch the print—just primes the nozzle
PrusaSlicer: Skirt and Brim > Brim Width and related settings
Bambu Studio: Adhesion > Brim or Raft. Most profiles use Brim by default.
VIII. Retraction & Stringing: Clean Up Those Strings What it is: When the nozzle moves between areas, it retracts the filament slightly to avoid oozing.
- More retraction = less stringing - Too much = clogs or jams
PrusaSlicer: Tuning > Retraction Distance + Speed
Bambu Studio: Filament > Retraction Settings — but usually tuned automatically for Bambu filament.
IX. Filament Settings: The Right Temp Matters Temperature: - PLA: 190–220°C - PETG: 230–250°C - ABS: 240–260°C (with enclosure)
Cooling: - PLA likes fans - ABS needs little to no fan
PrusaSlicer: Filament Settings > Temperature + Cooling
Bambu Studio: Choose filament type from the dropdown or import profiles
X. Final Tips - Start with stock profiles before tweaking - Always use Preview Mode to check for errors before exporting G-code - Save settings as Custom Profiles to stay organized - Watch the first layer! A perfect first layer solves 80% of print issues
Conclusion Learning slicer settings isn't just about quality—it's about control. Once you get a feel for the basics, you'll start dialing in prints for strength, speed, and detail with confidence.
Both PrusaSlicer and Bambu Studio are powerful, beginner-friendly slicers. Pick the one that matches your printer, stick with it for a while, and you'll be amazed how much you can do.